
Audience: Shopfloor tech standing at a freshly imaged PC. Scope: UDC not collecting data, and DNC not pushing programs to the controller. Run-from: Logged in on the imaged PC as the ShopFloor local account. GUI only - no shell required.
The few commands shown (e.g.
ping) run from a normal Command Prompt window.
Click any boxed node to jump to its section.
%%{init: {'securityLevel':'loose'}}%%
flowchart TD
Start([PC imaged - issue reported]) --> Sym{Which symptom?}
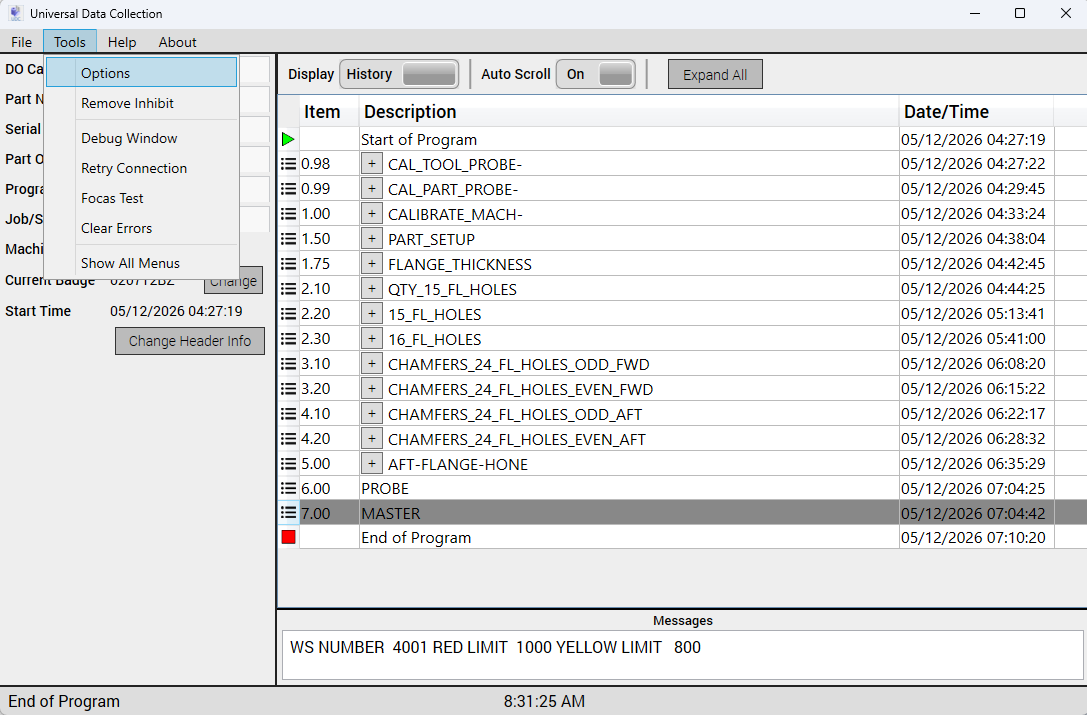
Sym -->|UDC not collecting data| U1[Open UDC: Tools - Show All Menus]
Sym -->|DNC not pushing to controller| D1{NTLARS General tab populated?}
U1 --> U2[Scan UDC_Password barcode from S:\SPC\UDC\UDC_Password.jpg]
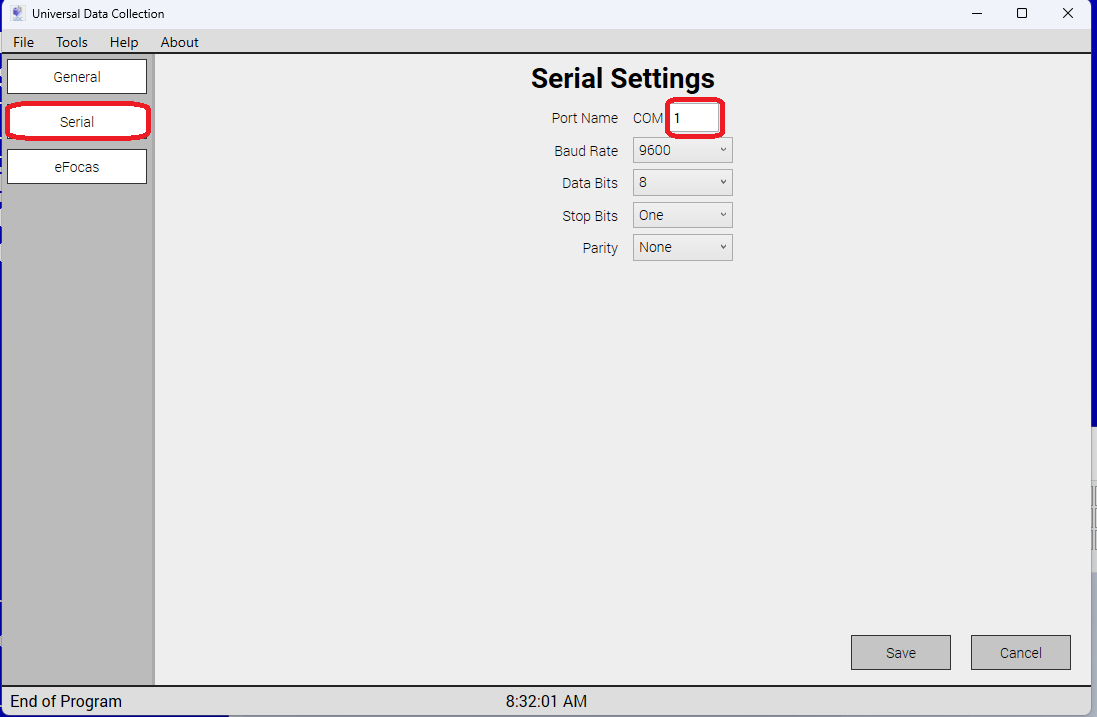
U2 --> U3[Tools - Options - Serial tab]
U3 --> U4{Which physical COM port is the cable in?}
U4 -->|Intel / onboard| U5[Set Port Name = COM 1]
U4 -->|PCIe add-in card| U6[Set Port Name = COM 2]
U5 --> U7[Save - File - Exit - reopen UDC]
U6 --> U7
U7 --> U8([Verify data lines populate])
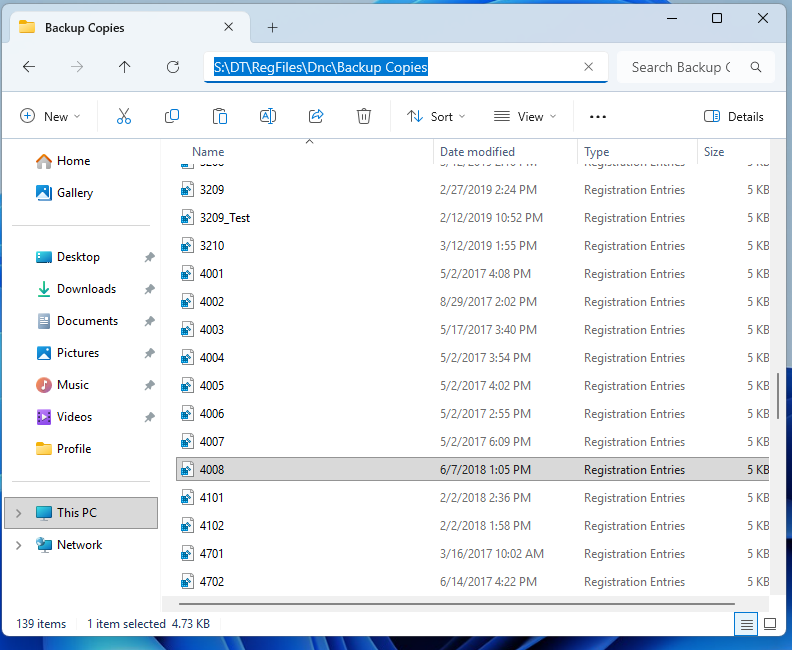
D1 -->|No - fields blank| D2[NTLARS: Load... -> S:\DT\RegFiles\Dnc\Backup Copies\machine.reg]
D1 -->|Yes - fields filled| FMS{FMS Host Primary = WJFMS3.AE.GE.COM?}
D2 --> D3[Confirm General tab populated - OK]
D3 --> FMS
FMS -->|No - shows WJFMS3 short| FMS1[Update Primary to FQDN WJFMS3.AE.GE.COM - OK]
FMS -->|Yes| NIC{Realtek PCIe GbE NIC = 192.168.1.2 / 24?}
FMS1 --> NIC
NIC -->|No| NIC1[Set Realtek PCIe GbE static IP 192.168.1.2 / 255.255.255.0]
NIC -->|Yes| NIC2[ping 192.168.1.1]
NIC1 --> NIC2
NIC2 --> NIC3{Ping replies?}
NIC3 -->|No| NIC4[Check cable / controller side / duplicate IP]
NIC3 -->|Yes| Done([Retest DNC push])
click U1 "#step-1-unlock-the-admin-menu" "Step 1 - Unlock admin"
click U2 "#step-2-scan-the-udc-admin-password-barcode" "Step 2 - Scan password"
click U3 "#step-3-open-options" "Step 3 - Options"
click U4 "#step-4-set-the-correct-com-port" "Step 4 - COM port"
click U5 "#step-4-set-the-correct-com-port" "Step 4 - COM 1"
click U6 "#step-4-set-the-correct-com-port" "Step 4 - COM 2"
click U7 "#step-5-exit-to-apply" "Step 5 - Exit"
click D2 "#2a-ntlars-reg-file-never-imported-blank-general-tab-fields" "2A - Load reg backup"
click D3 "#2a-ntlars-reg-file-never-imported-blank-general-tab-fields" "2A - Confirm populated"
click FMS1 "#2a-ntlars-reg-file-never-imported-blank-general-tab-fields" "2A - FMS Host FQDN"
click NIC1 "#2b-controller-nic-has-no-static-ip" "2B - Set static IP"
click NIC2 "#2b-controller-nic-has-no-static-ip" "2B - Ping check"
click NIC4 "#2b-controller-nic-has-no-static-ip" "2B - Troubleshoot"
UDC = Universal Data Collection desktop app on the imaged PC. Most "no data" issues post-deploy are not a service crash - they are the COM port pointing at the wrong physical serial port. Fix is a GUI procedure inside UDC, run as admin.
What you need before starting:
S:\SPC\UDC\UDC_Password.jpg (mapped S: drive must be working - if not, fix S: first via the standard mapdrive.bat runbook).Open UDC. Click Tools -> Show All Menus.
UDC will prompt for a badge scan to authorise admin mode:

The admin "password" is a barcode stored as a JPG on the S: drive.
Navigate File Explorer to S:\SPC\UDC\UDC_Password.jpg.
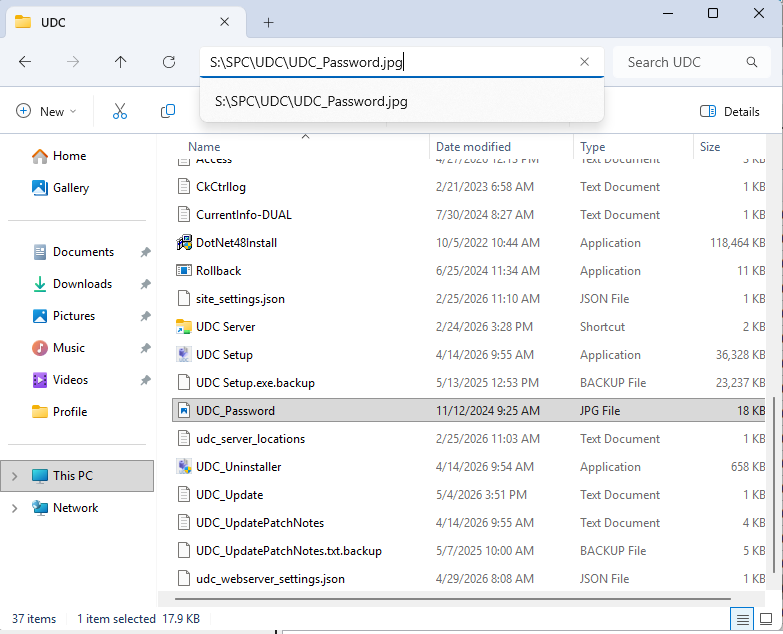
Open the JPG in Paint (or any image viewer that shows it at full size).
Point the badge scanner at the on-screen barcode and pull the trigger. UDC accepts the scan and unlocks admin mode.
With admin mode active, Tools now shows an extra Options item at the top of the menu. Click Tools -> Options.
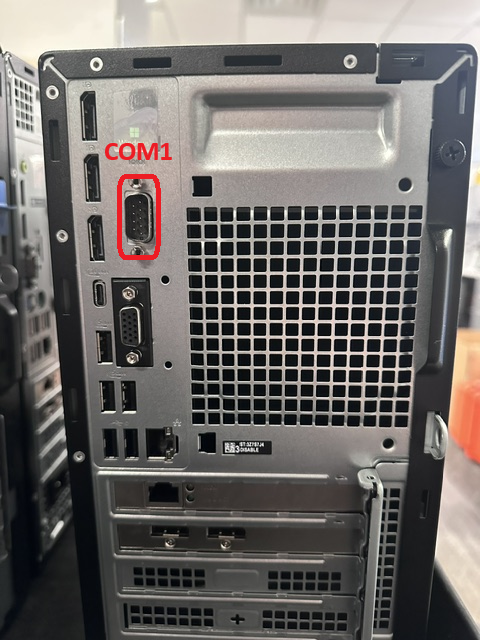
Click the Serial tab on the left. Set Port Name to match the physical serial port the machine cable is plugged into on the back of the PC.
COM 1 = onboard / Intel serial port (motherboard-integrated)
Logical:
Physical port to match:
COM 2 = PCIe add-in serial card
Logical:

Physical port to match:

Leave the rest at defaults: Baud 9600, Data Bits 8, Stop Bits One, Parity None.
Click Save.
Click File -> Exit. UDC must restart for the new COM port to take effect.

Reopen UDC. Data lines should start populating as the machine runs.
Once the COM port is correct, rule out check these in order:
Two independent root causes. Check in order: NTLARS first (cheaper), then NIC.
What it looks like:
Open NTLARS. General tab shows Site = WestJefferson but Machine No., CNC Type, Host Type, Interface Type are all empty.
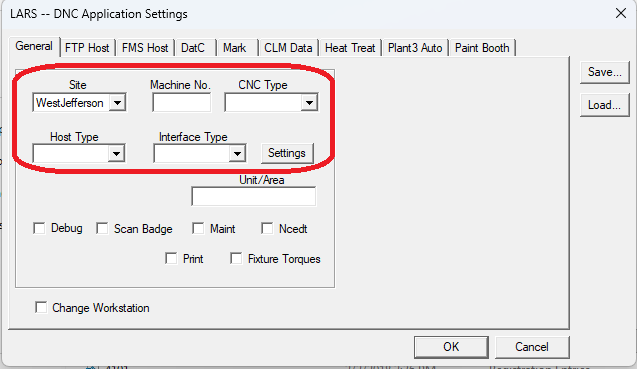
The per-machine reg backup never imported during imaging, so NTLARS has no machine-specific config.
Fix:
Note the machine number (printed on the PC asset label, or look up by hostname).
Browse to the DNC reg backup folder on the SFLD share:
S:\DT\RegFiles\Dnc\Backup Copies\
Each file is named <MACHINE-NUMBER>.reg (e.g. 4008.reg, 4001.reg, 3209.reg).
In the NTLARS settings dialog, click Load... (top-right of the dialog, next to Save).
Browse to S:\DT\RegFiles\Dnc\Backup Copies\ and select the .reg matching this PC's machine number. Confirm the import.
The General tab fields should now be populated. Click OK to apply.
While in NTLARS, click the FMS Host tab. Check Primary - the backup reg usually populates the short hostname WJFMS3 only. Update it to the full FQDN:
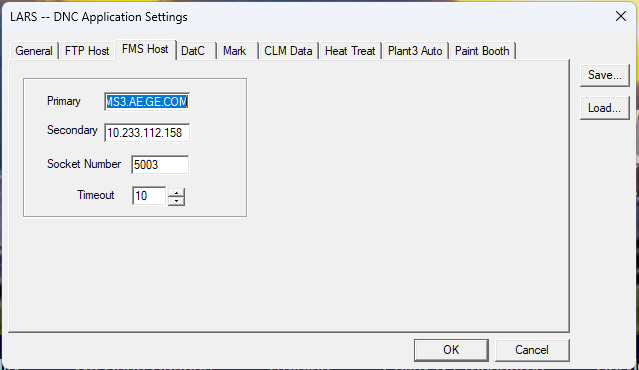
| Field | Required value |
|---|---|
| Primary | WJFMS3.AE.GE.COM (FQDN - not just WJFMS3) |
| Secondary | 10.233.112.158 |
| Socket Number | 5003 |
| Timeout | 10 |
Click OK to save. The short hostname fails on GE corp DNS in some shopfloor segments; the FQDN resolves reliably. The manifest drift-catcher will also normalise this on next run, but doing it now avoids waiting for the next manifest cycle.
If fields are still blank after import: the reg backup file is stale or for a different machine number. Pull the correct one and re-import.
The PC has two NICs. One faces the corporate / shopfloor LAN (gets internet); the other faces the controller on an isolated subnet (no internet - shown as "Unidentified network" / "No internet").
Standard controller-side config:
| Setting | Value |
|---|---|
| IP assignment | Manual |
| IPv4 address | 192.168.1.2 |
| Subnet mask | 255.255.255.0 |
| Default gateway | leave blank |
| DNS servers | Automatic (DHCP) - leave as-is |
Step-by-step (GUI - logged in as ShopFloor local account):
Right-click the network icon in the system tray. Select Network and Internet settings.
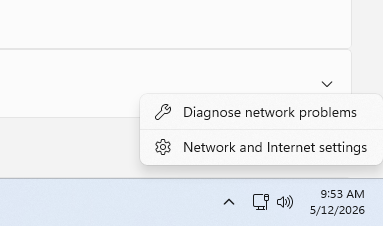
In Network & internet, identify the controller-facing adapter. On every PXE-imaged shopfloor PC the controller NIC is the Realtek PCIe GbE Family Controller. It will also show "No internet" / "Public network" (the other adapter, with internet, is the shopfloor LAN). Click into it.
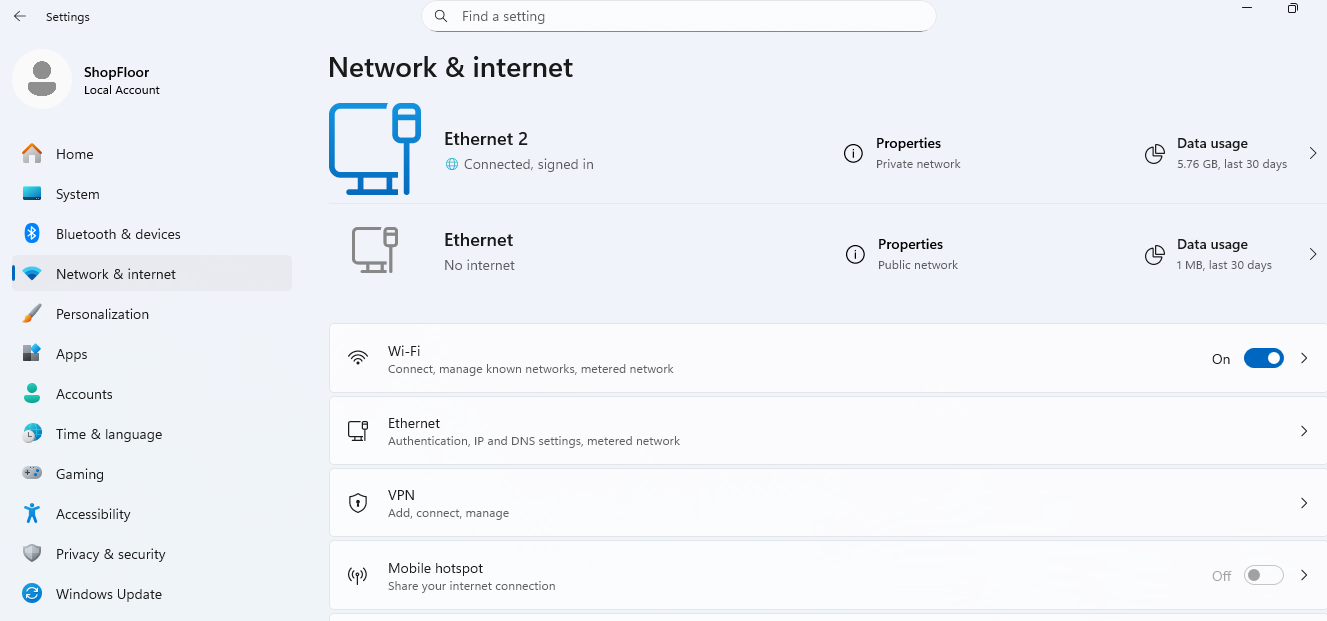
Confirm at the bottom of the adapter detail page that Description = Realtek PCIe GbE Family Controller:
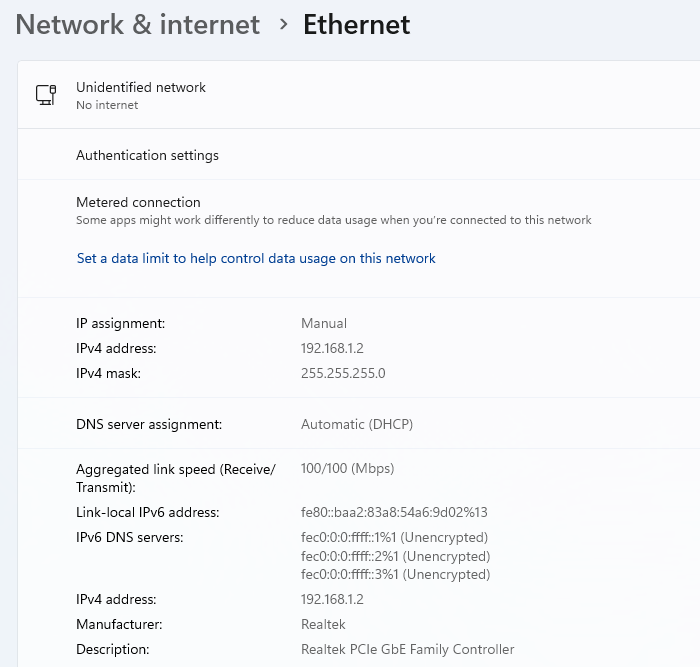
Scroll to IP assignment. If it shows Automatic (DHCP) or the IPv4 address is 169.254.x.x / blank: click Edit next to IP assignment, switch to Manual, enable IPv4, and enter:
192.168.1.2255.255.255.0Save.
Verify. The adapter detail should now show:
Verify connectivity to the controller:
The controller is always at 192.168.1.1 on this subnet. Open Command Prompt and run:
ping 192.168.1.1
Expected: 4/4 replies.
If pings fail:
192.168.1.2 (duplicate IP). In Network & internet, check both Ethernet adapters - only the Realtek PCIe GbE one should have it.